Progress - Stairwell
December 2013
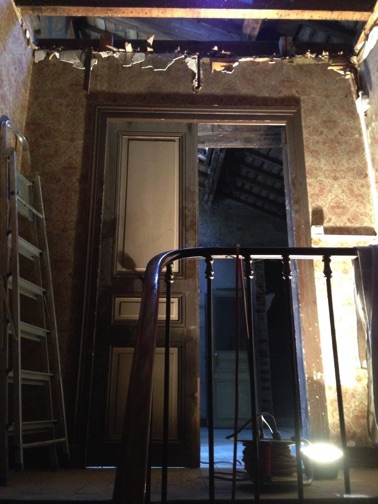
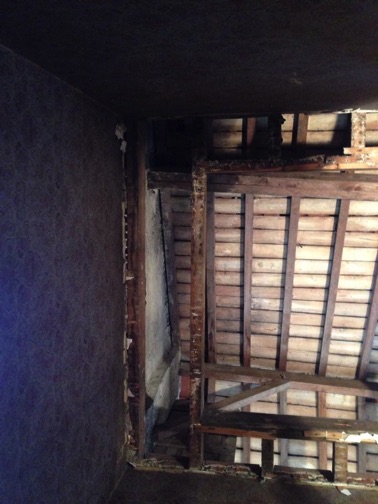
The removal of the ceiling plaster in the Foyer continued into the Stairwell, leaving just the walls of the stairwell. Looking straight up from the stairs leading to the 2nd Floor, one saw the roofing structure directly overhead. This view, coupled with the discovery of a previously-hidden skylight in the attic, led to the decision to move the skylight when it was being replaced, so that it was positioned directly above the Stairwell, thus providing ample daytime light in the Stairwell, plus an interesting view at night. Seeing the roof from this direction also showed clearly that the ridge beam in the roof was not parallel with any of the walls on the floors below. This was an assumption we had always made, as illustrated in the floorplans above. I decided not to change the plans, but merely let the builders be aware of, and work around, this peculiarity as they did the renovations. I already had enough problems using the 3D software with a front wall that was not parallel to the back wall; adding in a ridge beam that was not parallel to either wall would just be one complication too many!!
March 2014
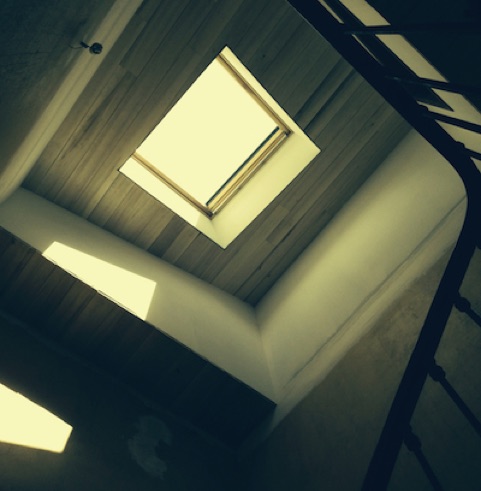
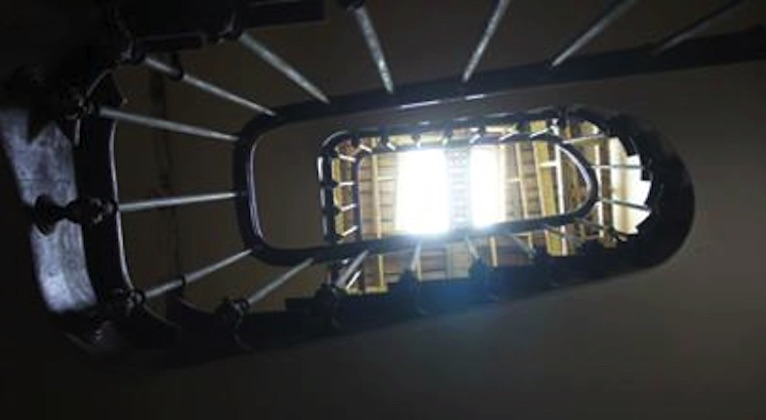
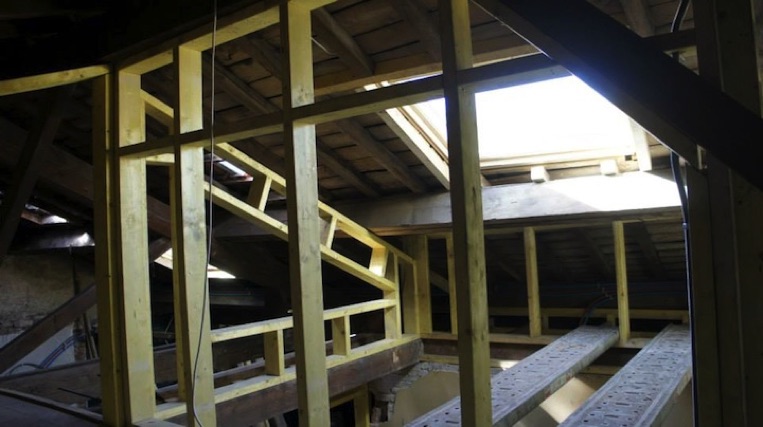
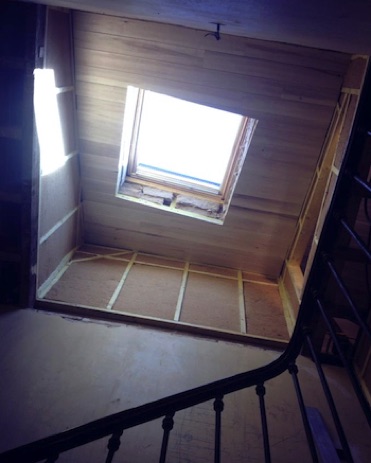
The installation of the skylight at the top of the Stairwell has had a dramatic effect, as illustrated by this photo taken from the Ground Floor. Light now floods the entire Stairwell during the day. However, this photo also highlights one little problem with the skylight (and all the other skylights in the roof). Because the roof facing Rue Gambetta is not rectangular (with an angled frontage along Rue Gambetta), a design decision had to be made in the original construction of the building as to the orientation of the tiles - should they run at right-angles to Rue Gambetta, or at right-angles to the ridge line of the roof, or parallel to the side walls of the house (which are not parallel to each other!). In the end, the decision must have been made to run the tiles at right-angles to Rue Gambetta. The same decision needed to be made in relation to the orientation of the skylights. In the end, it was decided that the skylights should run parallel to the roofing tiles, for ease of installation in not having to cut tiles and to improve protection from the weather. However, this means that the skylights are not parallel, or at right-angles to, the internal walls. This is clearly seen below by comparing the skylights with the surrounding roofing battens. An unfortunate and inescapable feature, which will undoubtedly be a topic of conversation for decades to come! Old houses simply have much more character than new houses.
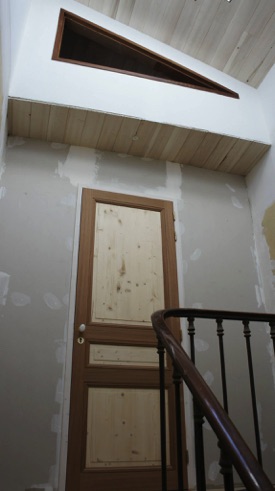
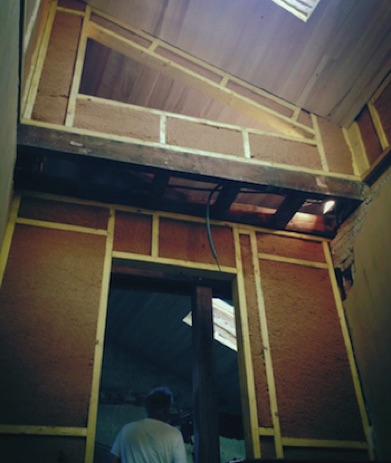
Once the plans for the 2nd Floor renovations were finalised in February 2014, work began in earnest on the 2nd Floor Stairwell. The doorway and wall to the Stairwell were removed, and replaced with a new wall (in a slightly different position to line up with other features) and a space for a large single entrance door (in place of the previous double-doors). Above the Stairwell door wall a dividing wall was built that continued across as the wall separating the Mezzanine and the Attic. In this wall above the Stairwell, a triangular glass window was to be installed. In front of this wall in the Foyer space, pot plants and sculptures could be placed.
The new door from the Stairwell would open outwards into the Stairwell, rather than inwards into the room because of space limitations immediately inside the doorway, as was very clear when the half-height walls for the Kitchenette were later constructed.
The Stairwell front door will open outwards to the right, thus making for relatively easy entry and not blocking anything with the open door.
Above the Stairwell, the walls on all sides will be extended to the ceiling under the roofline, capped by a large skylight in the roof. On the wall nearest the Kitchenette below, a triangular window will admit light from the Stairwell skylight.
The triangular window above the Stairwell door will complement the triangular shape of the structural timbers above the Kitchenette entrance. At the rear of the Stairwell, the back wall will stand away from the external wall by about 50cm, to allow the VMC ductwork to run though this area to connect from the Services Shaft at the rear of the Toilet Room to the VMC unit located in the Attic.
April 2014
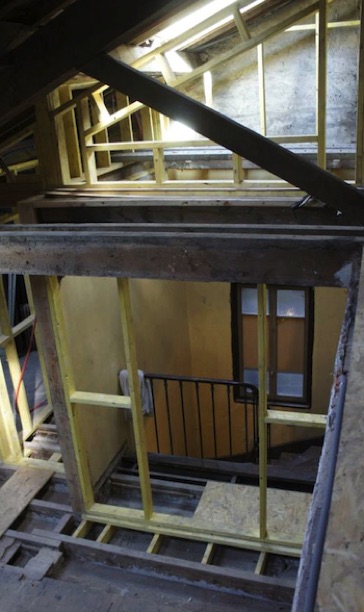
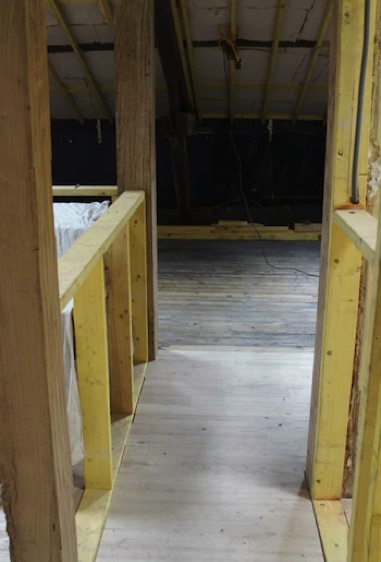
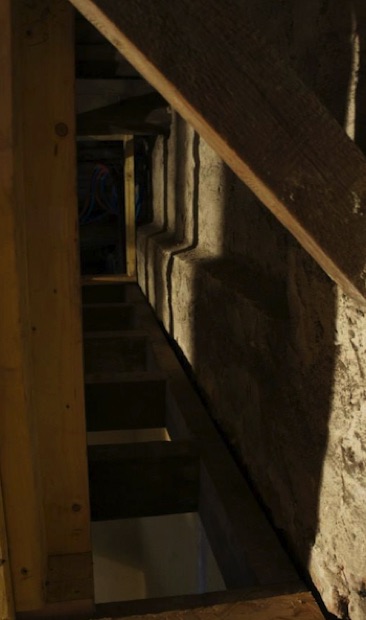
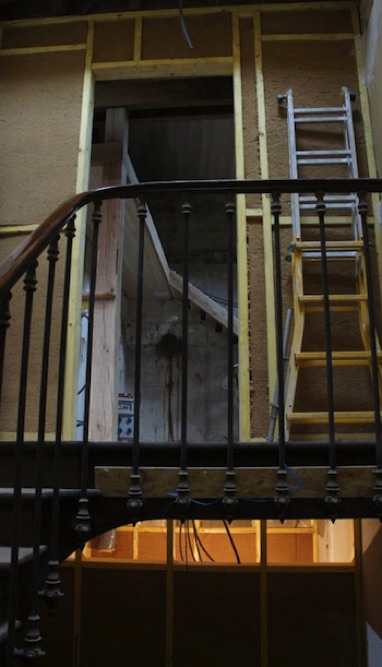
All the stairwell landing floors have now been completed, as seen in this photo from the 2nd Floor.

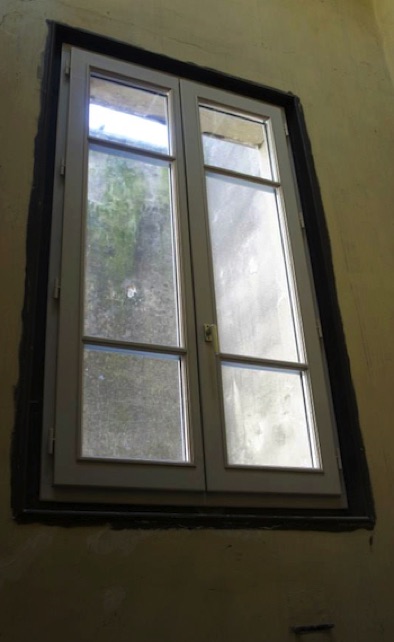
Looking up the Stairwell to the roof shows the clear skew of the skylight, now that the ceiling panelling has been completed - unfortunate, but a talking point nonetheless! Also clearly visible, for the moment, are the VMC ductwork pipes running through the space at the rear of the Stairwell (at right of photo). The windows from the Stairwell out into the Lightwell have also been replaced with double-glazed versions.
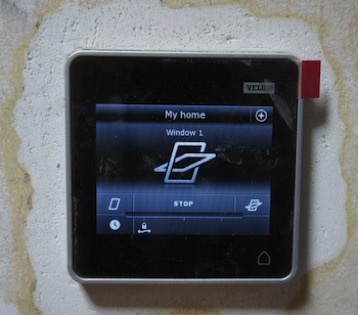
Because the skylight in the Stairwell is so high and inaccessible, it was necessary to have a remote control opener in a convenient location (on the wall of the Stairwell on the 2nd Floor landing). The old house had a long metal winder pole to open the skylight in the old Storage Room, which was also inaccessible. We decided to go with something more modern, but may mount the old winder pole on the Stairwell wall, just as a reminder of times past.
May 2014
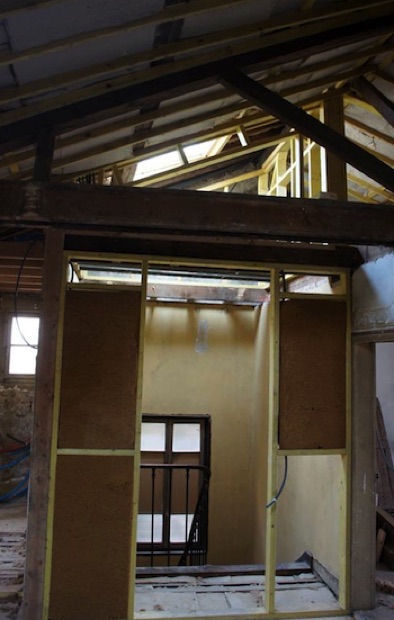
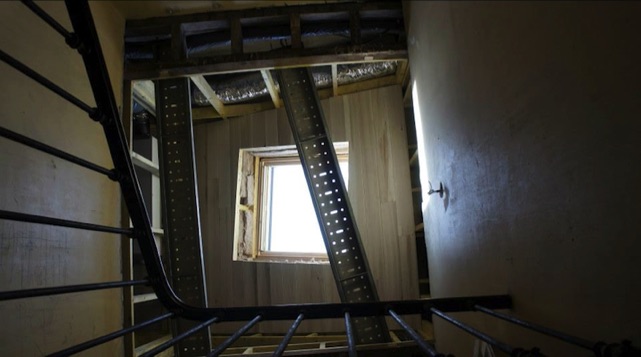
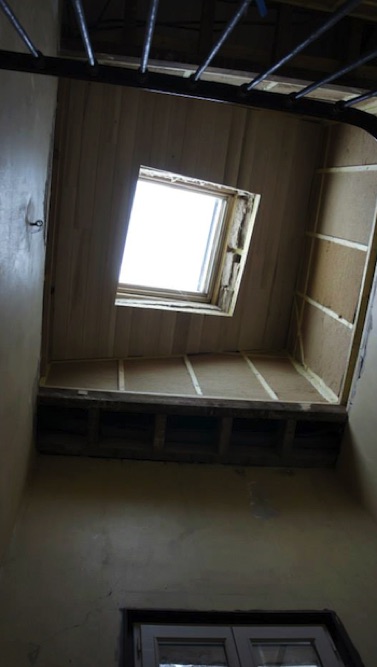
Now that the Stairwell structures have been finished, the insulation batts have been placed in the walls ready for the plastering to begin. One can now get a better feeling for how the finished stairwell will appear from below. Unfortunately, the skew in the skylight placement becomes more apparent as the stairwell nears completion, but this is an unavoidable "feature" because of the non-rectangular building footprint.
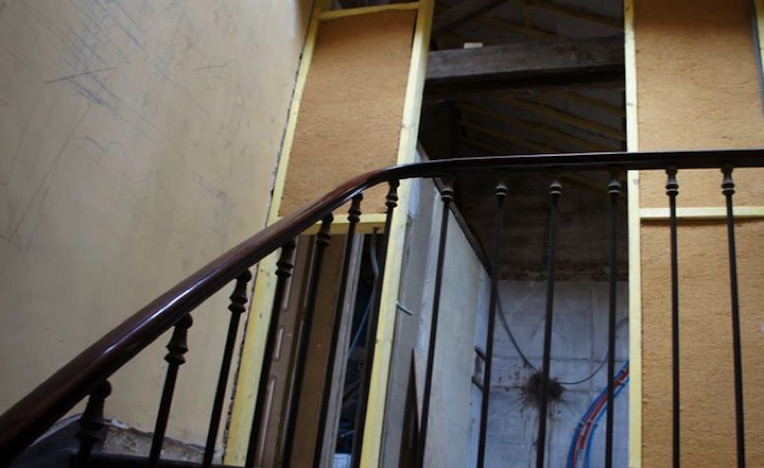
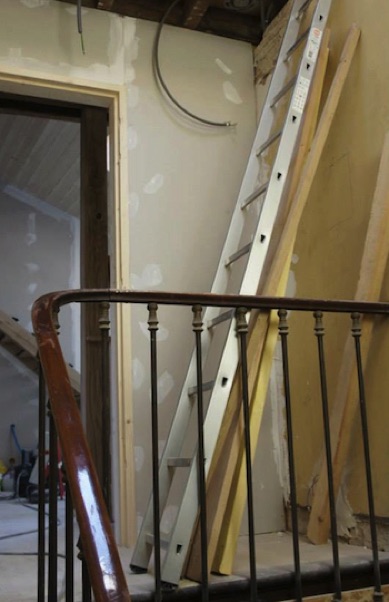
Another view of the Stairwell skylight from a different angle, also showing the new windows looking out to the Lightwell. The new wall out of the Stairwell on the 2nd Floor is shown above the new wall separating the Stairwell lobby from the new Ensuites on the 1st Floor. This photo illustrates nicely that things were happening on many levels during the renovation.
June 2014
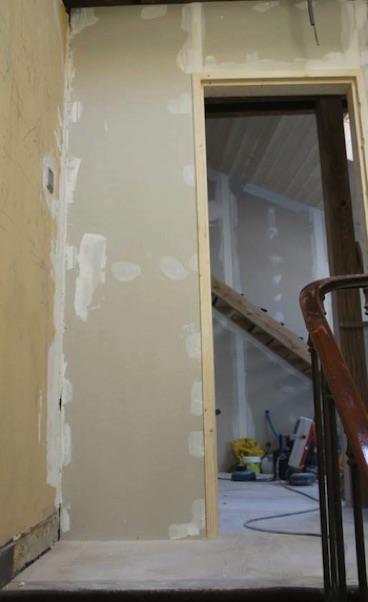
Plastering work started in the Stairwell, with the walls on either side of the new entrance door receiving the treatment.
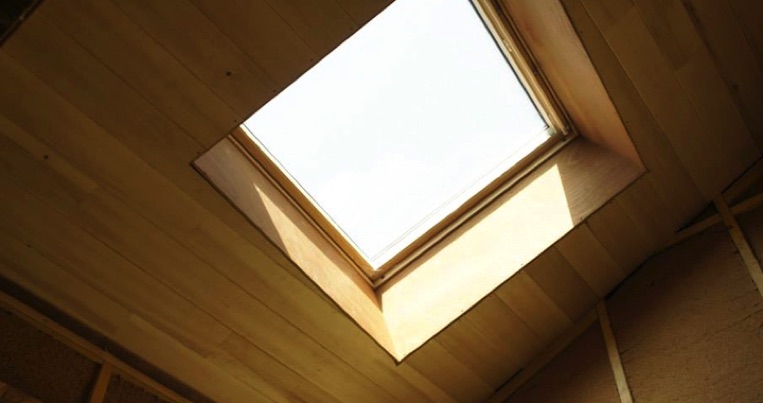
The skylight at the top of the Stairwell also got some treatment, but of a different sort, when CPX plywood was used to trim the inside of the skylight cavity. Looks much more finished, and the golden honey colour in the sunlight is fabulous.
July 2014
The custom-made door to the top-floor apartment from the Stairwell has now been installed, and the area around the skylight has been plastered and painted.